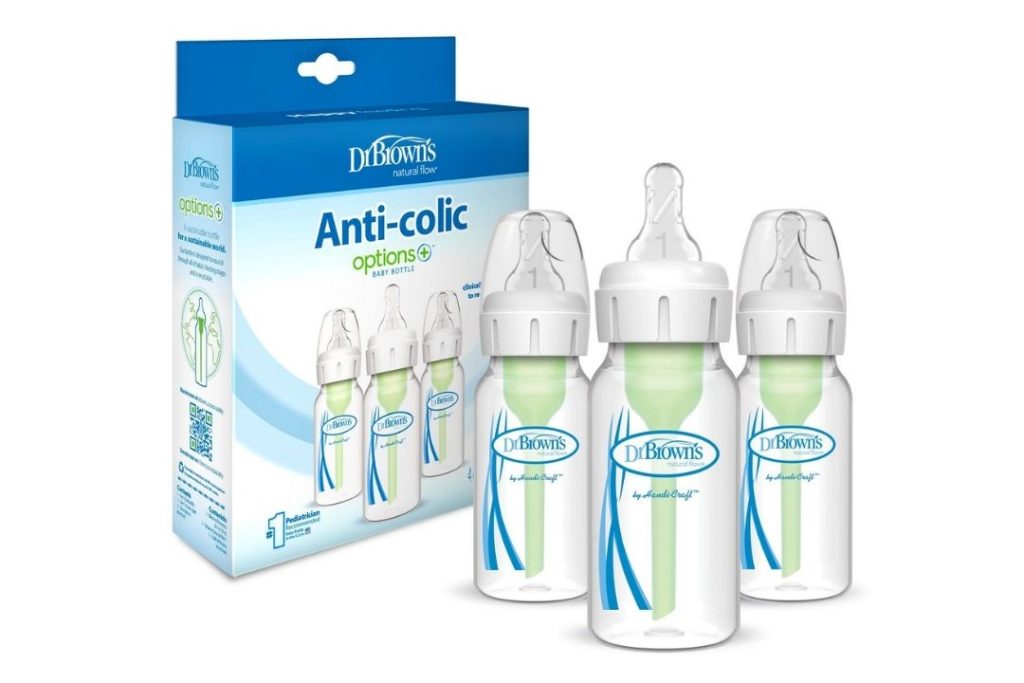
When it comes to feeding your little one, you want nothing but the best. Dr. Brown’s bottles have gained immense popularity among parents due to their innovative design and features. However, like any product, occasional issues may arise, such as bottles leaking. In fact, a study found that 1 in 5 parents reported issues with Dr. Brown’s bottles leaking. If you’re facing this problem, don’t worry! In this article, we’ll explore the reasons behind the leakage and provide practical solutions to address the issue effectively.
In This Article
What are Dr. Brown’s Bottles?

Dr. Brown’s bottles are a brand of baby bottles designed to minimize the intake of air during feeding, reducing colic, gas, and other feeding problems in infants. These bottles incorporate a unique venting system that helps preserve essential vitamins, minimize oxidation, and maintain a positive pressure flow for a more natural feeding experience.
The Issue of Leakage
While Dr. Brown’s bottles are widely praised for their benefits, some parents have experienced leakage problems with these bottles. Leaking can occur when the bottles are not properly assembled, leading to milk or formula spilling out from the bottle’s nipple or collar. This issue can be frustrating for parents, as it can result in messes and wasted breast milk or formula.
Factors Contributing to Leakage
Several factors can contribute to the leakage of Dr. Brown’s bottles. It is important to understand these factors to effectively address the issue. Here are some common reasons for bottle leakage:
1. Improper Assembly
One of the primary reasons for leakage is improper assembly of the bottle’s components. Dr. Brown’s bottles have multiple parts, including the nipple, vent insert, collar, and bottle base. If these components are not securely tightened or positioned correctly, it can lead to leakage.
2. Damaged or Worn-out Parts
Over time, the bottle’s components, such as the nipple or collar, may become worn out or damaged. This can compromise the bottle’s integrity and result in leakage. Regularly inspecting and replacing worn-out parts can help prevent this issue.
3. Overfilling the Bottle
Overfilling the bottle beyond its recommended capacity can cause leakage. When there is insufficient space for the milk or formula to expand, pressure can build up, leading to leaks. Following the manufacturer’s guidelines regarding filling levels is crucial to prevent this problem.
4. Temperature Changes
Rapid temperature changes can affect the bottle’s venting system and lead to leakage. For example, if a warm bottle is suddenly exposed to cold temperatures, the air inside can contract, causing the liquid to be forced out of the bottle. Allowing the bottle to adjust to room temperature before feeding can help minimize this issue.

How to Prevent Leakage
Now that we understand the factors contributing to leakage, let’s explore some practical steps to prevent it:
1. Proper Assembly and Tightening
To ensure the safe and effective use of your bottle, it is crucial to assemble all components correctly and securely tighten them. Start by examining all parts of the bottle, including the cap, lid, and any additional attachments. Carefully align the threads of the cap and bottle, making sure they are straight and not cross-threaded.
Then, tighten the cap by turning it clockwise until it is snug. Be cautious not to over-tighten it, as this can cause the bottle to leak or even break.
If your bottle includes a lid or other attachments, ensure they are also correctly assembled and securely fastened. It is essential to follow these steps every time you use your bottle to prevent any accidents or spills. By taking the time to properly assemble and secure your bottle, you can enjoy its benefits to their fullest potential.
2. Check for Damaged Parts
Regularly inspect the bottle’s components for any signs of damage or wear. Replace worn-out parts, such as the nipple or collar, to maintain the bottle’s integrity and prevent leakage. If you notice any cracks, tears, or deformities, it’s best to replace the affected part immediately.
3. Follow Filling Guidelines
Always follow the recommended filling guidelines provided by Dr. Brown’s for their bottles. Overfilling the bottle can lead to excessive pressure and leakage. Be mindful of the maximum capacity and leave enough room for the liquid to expand if necessary.
4. Use Slow, Controlled Flow Nipples
Dr. Brown’s bottles offer a range of nipple flow options to accommodate different feeding stages. If your baby is experiencing leakage issues, consider using a slower flow nipple. This can help regulate the flow and reduce the chances of overflow and leakage.
5. Avoid Excessive Shaking
While it’s important to mix the formula or gently swirl the bottle to ensure even distribution, excessive shaking can introduce excess air into the bottle, leading to leaks. Instead, opt for gentle agitation to minimize the risk of leakage.
6. Gradual Temperature Changes
To prevent sudden temperature changes that can cause leakage, it’s recommended to gradually warm or cool the bottle. Avoid exposing the bottle to extreme temperature shifts. By allowing the bottle to adjust gradually to room temperature or the desired temperature, you can minimize the chances of leaks.
Cleaning and Maintenance
Proper cleaning and maintenance of Dr. Brown’s bottles are essential for preventing leakage. Follow these steps to ensure optimal bottle hygiene:
- Disassemble the bottle completely.
- Rinse all parts with warm water immediately after each use to remove any residual milk or formula.
- Use a bottle brush and mild dish soap to thoroughly clean all components, paying special attention to the vent insert and nipple.
- Rinse all parts again to ensure there is no soap residue.
- Allow the components to air dry or use a clean, lint-free cloth to dry them thoroughly before reassembling.
- Regular cleaning and maintenance will help keep the bottle in good condition and minimize the risk of leakage.
Other Common Concerns
Apart from leakage, Dr. Brown’s bottle users may have other common concerns. Here are a few of them:
1. Cleaning Difficulties
The multiple components of Dr. Brown’s bottles may seem daunting to clean initially. However, following the cleaning guidelines provided and establishing a routine can simplify the process.
2. Nipple Collapse
Nipple collapse can occur if the vent system is not working correctly. Ensure the vent insert is properly in place and replace worn-out nipples to address this issue.
3. Slow Flow
If you find the flow too slow for your baby’s needs, you can try a faster flow nipple. However, be cautious and consider your baby’s feeding abilities and age.
Commonly Asked Questions
Why are my Dr. Brown’s bottles leaking even though I assembled them correctly?
If you’ve followed the assembly instructions correctly and are still experiencing leaks, check for any damaged or worn-out parts. Replacing the worn-out components should resolve the issue.
Can I use Dr. Brown’s bottles for breastfeeding babies?
Yes, Dr. Brown’s bottles can be used for breastfeeding babies as they are designed to mimic the natural flow of breastfeeding and reduce nipple confusion.
How often should I replace the parts of Dr. Brown’s bottles?
It is recommended to regularly inspect and replace worn-out or damaged parts. As a general guideline, nipples should be replaced every 2-3 months or sooner if signs of wear are evident. Other components, such as the collar and vent insert, can be replaced as needed.
Are Dr. Brown’s bottles dishwasher-safe?
Yes, Dr. Brown’s bottles are generally safe to use in the dishwasher. However, it’s important to refer to the specific instructions provided with the bottles to ensure proper cleaning and maintenance.
Can I use Dr. Brown’s bottles for formula feeding?
Absolutely! Dr. Brown’s bottles are suitable for both breast milk and formula feeding. The venting system in the bottles helps reduce gas and colic, providing a comfortable feeding experience for your baby.
What should I do if my Dr. Brown’s bottle continues to leak despite proper assembly?
If you have followed all the recommended assembly steps and the bottle still leaks, double-check that all components are securely tightened. Additionally, ensure there are no cracks or damage to any of the parts. If the issue persists, reach out to Dr. Brown’s customer support for further assistance.
Can I use other brands’ nipples with Dr. Brown’s bottles?
Dr. Brown’s bottles are designed to work optimally with their own nipples. While some parents may experiment with other brands’ nipples, it’s important to note that it can affect the bottle’s venting system and potentially lead to leakage. It’s best to use Dr. Brown’s nipples for optimal performance.
How often should I replace the silicone rings?
It is recommended to inspect the silicone rings regularly for any signs of wear and tear. If you notice cracks, stretching, or loss of elasticity, it’s time to replace the silicone ring. As a general guideline, replacing the silicone ring every 3 to 6 months, or as needed, can help maintain the integrity of the seal and prevent leaks.
Final Words
Dr. Brown’s bottles are renowned for their ability to reduce feeding problems in infants. While leakage can be an occasional concern, understanding the factors behind it and implementing preventive measures can minimize this issue. By following proper assembly techniques, adhering to filling guidelines, and practicing regular cleaning and maintenance, parents can ensure a positive feeding experience with Dr. Brown’s bottles.


